Voice Chat Configuration for Minecraft
Voice Chat Mods
Voice chat mods require ports to be forwarded. So to use any of the following voice chat mods, you'll need to follow the port forwarding and configuration instructions below to use them on your server.
To use the voice mods below, you'll need to download one of them and then upload it to your mods folder.
Port Forwarding
- Start your server to create the config file for the voice chat mod.
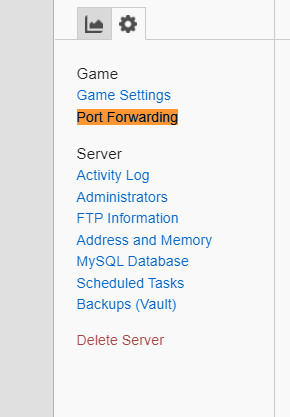
- Stop your server and click on Port Forwarding. If you do not stop the server the system will not let you add your port.

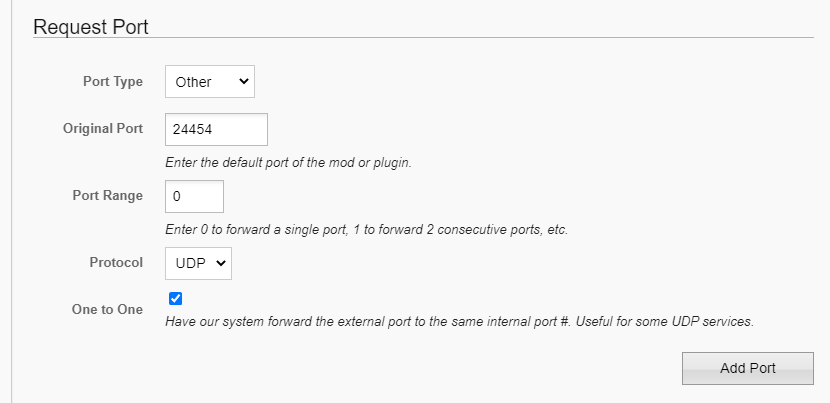
- Fill out the Request Port form as follows:
- Port type: Other
- Original Port: 24454
- Port Range: 0
- Protocol: UDP
- And check One to One

- Click Add Port
- Once you add the port it'll generate a public and private number that both should be the same if it was done correctly. You'll want to remember this number as we'll be adding it to the config.
Configuration
- Once you have that port number you’ll want to navigate to the config for the mod and click on it in the Files tab.
- For Simple Voice Chat older versions of Forge: world/serverconfig/voicechat-server.toml
- For Simple Voice Chat for Forge and Fabric: config/voicechat/voicechat-server.properties
- For Simple Voice Chat plugin: plugins/voicechat/voicechat-server.properties
- For Modular Voice Chat: config/modularvc-server.toml
- For Plasmo Voice for Forge: config/PlasmoVoice/server.yml
- Locate
port=SOMENUMBERSand replaceSOMENUMBERSwith the port number you created in the previous section. - Locate
voice_host=ip:portwhere ip:port is your server's IP followed by a port number. Make sure the IP address listed is your server's IP, found at the top of the page, and change it if it is not, then change the port to the new port you just created.serverip:newport- Note: the port in the config (the bit after the colon) should not match the port at the top of the page. It should match the port you just created/forwarded. The IP before the colon should match the IP before the colon at the top of the page, which is your server's IP.
- Save your config and restart your server for the port to take effect.
Updated 3 months ago

