Make a CurseForge Launcher Modpack and Server Pack
Install the CurseForge Launcher
First, you will need to install CurseForge.
- Go to their website and download the client.
- Run the installer on your computer.
- When it's done and set up, run the CurseForge Launcher.
Enable the Minecraft Plugin
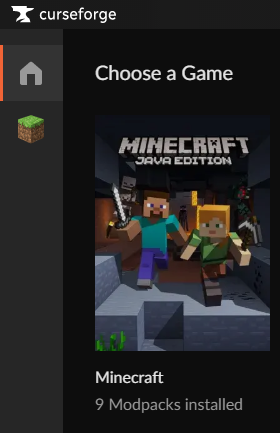
To enable the Minecraft plugin in the CurseForge Launcher click on minecraft from the launchers home page, then press install!

Create a Custom Profile
- From within the CurseForge Launcher, click on the Minecraft tab
- Click
+ Create Custom Profileat the top right. - Give the profile whatever name you'd like.
- Choose the Minecraft version, such as 1.16.5, and choose the modloader. The 3 of note will be Forge, Fabric, and Neoforge. Mods for different modloaders are not compatible with each other! So you will need to make sure you are picking the correct modloader for your needs.
- Press the Create button and the launcher will create your custom profile.
Install Mods
In the Modpacks tab, you should now see your new custom profile in My Modpacks. If you were to install any other modpacks, you would see them here as well. You can choose to play the custom profile you just created, but it wouldn't have any mods yet. It would be just like vanilla Minecraft, so let's install some mods.
- You can either click on the profile image, or right click it for a context menu and choose View Profile.
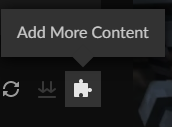
- There will be three tabs: Mods, Resource Packs, and Maps. Next to that on the right is a puzzle piece button that when hovering over will display Add more content, click that.

- In the search box, type in the name of a mod that you would like to filter results and press enter. Now you can click on a mod in the list to go to the mod's page, or you can click on the Install button to install it directly.
- On the mod page, you can learn more about a mod or choose which version to install from the Versions tab.
Installing Third Party Mods
Within the Curse ecosystem, a third party mod refers to any mod that isn't hosted on CurseForge. For mods not on curseforge there is a list of which ones are allowed which you can see here: list of Non-CurseForge mods
You can install a third party mod to any single player modpack without any issues at any time. However if any mod you have added is not on the third party list, you will not be able to upload your modpack and make it public.
Install a Third Party Modpack
- Select the more (three dots) option in the upper right corner of your modpack profile page.
- Open the folder.
- Drag and drop the mod you would like to add into the mods folder.
Export Modpack
If you would like your friends to be able to play your modpack with you on your server, you will need to export the pack:
- From your modpack profile, select the more button (three dots) and choose Export Profile.
- You will need to give it a name, a package version, and choose what files will be included in the package.
- This will create a zip file and you will need to choose where to save it.
- Make sure to put it somewhere that you can find it easily later!
Importing a modpack
Your friends can then import the profile by following these steps:
- On the My modpacks page, click
+create custom profileat the top right of the launcher - Press import and select the zip and press open

Uploading a modpack to curseforge
They have a set of guidelines that you will need to follow. You can find this information on CurseForge, but the most important information to keep in mind is what will get your modpack rejected:
- If it is a copy/clone of a modpack uploaded by someone other than the owner/author
- If it includes mods NOT on the Third Party list
- If it includes texture packs belonging to someone other than the creator
- If it does not meet the description and logo guidelines
Create a Curse Modpack Project
Next you will need to go to CurseForge and start a new project. Choose the modpack option. You will be presented with a form page. Fill out all of the options for your modpack and then click Start Project when you are done. Before anyone can use this modpack, it must be approved by a Curse moderator.
You will need to upload your exported CurseForge Launcher modpack that you just created. It contains the modpack manifest, configs, and any third party mods that you might have added.
- From your CurseForge modpack project page, click the File button with an up arrow next to it.
- Choose the exported modpack zip as the file to upload.
- Fill out any of the information that you would like to, such as the display name, release type, and changelog. You are required to set the supported Minecraft versions.
- When you're done, make sure to Submit the File.
After your modpack gets approved, anyone should be able to download it.
Provide a Server Pack on Curse
If you would like other people to be able to create servers with your modpack, it's pretty simple. First, convert your modpack into a server pack.
- Go to your modpack's profile page in the CurseForge Launcher.
- Click the more button (three dots) in the upper right corner.
- Choose open folder.
- Copy all of the files and folders except for
.curseclient,minecraftinstance.json, andmods/mod_list.jsoninto a separate folder. Make sure the folder is empty and that it's somewhere that you will be able to find again later. - Next, install the Forge Server into that folder. You just need to do the first section of that tutorial: Download All Forge Files.
- Make sure to remove all client only mods from your mods folder. Client only mods might include HUDs, GUIs, custom loading screens, resource loaders, minimaps, or anything else. You will need to check with the specific mod pages to determine if it is client only.
- Zip up all of the files, including the
mods,config, the server .jar file(s), and any other files you might include in your modpack like custom scripts. - On your CurseForge modpack project page, click on the Files tab. Choose the version associated with the server pack you just created. Scroll down until you see Upload Additional File. Upload the server pack you just created.
Updated 3 months ago
