How to Allocate More RAM to Minecraft Launchers | Akliz
This Article will guide you through increase the ram on different modpack launchers.
How to Allocate More RAM to Minecraft Launchers
How to Allocate More RAM in the Default Minecraft Launcher
Allocate more RAM for individual installations in the default Minecraft Launcher:
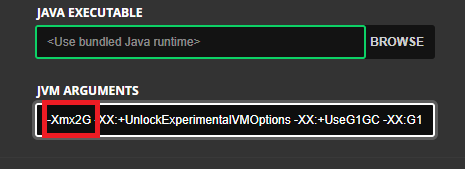
- The Default allocated amount is 2GB
- Open the Minecraft Launcher and click on "Installations" at the top middle of the interface.
- Select the installation you want to adjust and click "Edit."
- In the editing menu, click "More Options."
- Locate "JVM Arguments" and change the value in -Xmx2G to the amount of RAM you want to allocate (e.g., -Xmx4G for 4GB).
How to Allocate More RAM to Minecraft in the Curseforge Launcher
Easily adjust the RAM for all your Curseforge modpacks:
- Open the settings by clicking on the cogwheel in the bottom-left corner of the client.
- Under "Game Specific," select "Minecraft."
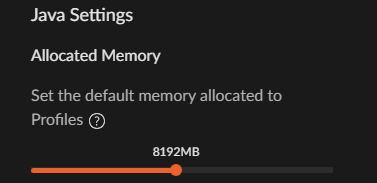
- Scroll down to "Java Settings" and adjust the allocated memory to your desired amount.
How to Allocate More RAM to Minecraft in the Technic Launcher
Adjust the RAM allocation for all your Technic modpacks:
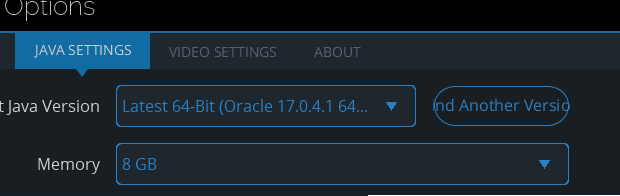
- Open the Technic Launcher and click on "Launcher Options" in the top-right corner.
- Click on the "Java Settings" tab.
- Under "Memory" you can adjust allocated memory.
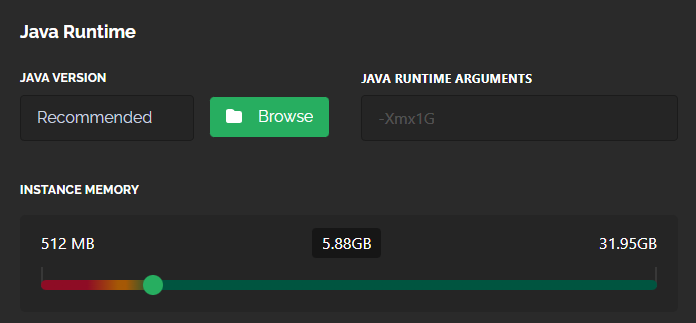
How to Allocate More RAM to Minecraft in the Feed the Beast App (FTB)
- In the Library click the profile or modpack for which you want to increase the RAM.
- In the modpack information click on "Settings".
- Under the "Java Runtime" you should see "Instance Memory" to adjust your allocated memory.
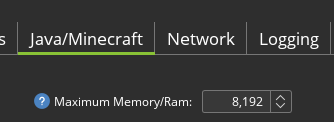
How to Allocate More RAM to Minecraft in the ATLauncher
Increase RAM allocation for all modpacks in the ATLauncher:
- Open the ATLauncher and click "Settings" from the menu on the left-hand side.
- Click on the "Java/Minecraft" tab.
- Under "Maximum Memory/Ram" adjust your allocated RAM.
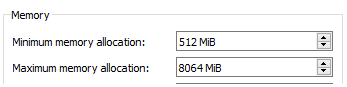
How to Allocate More RAM to Minecraft in Prism Launcher or MultiMC
- Open the launcher and navigate to "Settings" from the top menu.
- Click on the "Java" tab.
- Adjust the "Maximum memory allocation" to increase the allocated RAM.