
Uploading a World to your Valheim Server
Changing your Save to Local
Your world might be stored in the cloud automatically. If it is, you won't be able to access it until you change it to be saved locally.
-
Launch Valheim.
-
In game under Select World you'll want to go to Manage Saves.
-
Select the world you want then click
Move to Local.
Locate Your Files on your Computer
-
Hit Windows Key+R on your keyboard.
-
In the field that pops up, type
appdata. -
Double-click on
LocalLowthen onIronGatethenValheim. Doing so should put you in a folder that looks similar to this:

-
All worlds should be saved under the
worlds_localfolder now. You'll want to get world name you want and ends in.fwl.
Uploading your Files to your Server
Before uploading anything and changing the settings, shut down your server.
- Connect to your server using SFTP.
- Drag the `
world.fwlfile you have from theworld_localfolder on your PC to the following folder on your server:.config/unity3d/IronGate/Valheim/worlds_local. If you do not see this file you may need to have your SFTP client Show hidden files.
Configure Your server to Use Your Files.
- Open Your Command Center.
- Click on Manage next to the server you've been uploading files to.
- Click on Game Settings on the left hand side under the cog wheel tab.
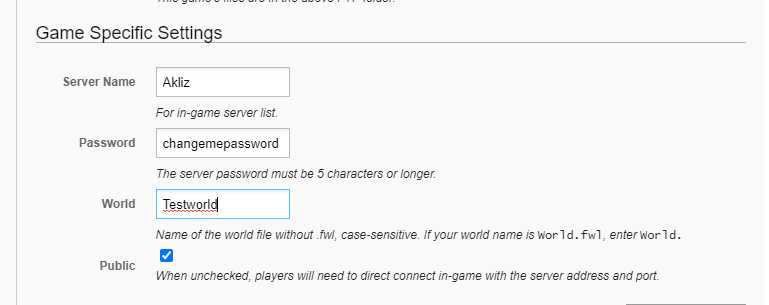
- Under Game Specific Settings you'll want to change the world name to the one you uploaded and save.
- Start your server.
- Enjoy!

Updated 8 months ago
Did this page help you?