
How to Set Up a Palworld Dedicated Server
Host your Palworld server with ease using Akliz’s high-performance hosting.

Why Host a Palworld Server?
Hosting a server with Akliz has several benefits over playing without a server, self-hosting, or hosting with another host.
- Performance: Using a dedicated server can drastically improve performance on your computer, since many of the game processes are offloaded from your computer to the server.
- Easy Control over gameplay settings: With an Akliz server, you have full control over your game. You have direct access to the files for customization.
- Opportunities to play with friends and build community: Having a server is great for playing with friends. The server can be online 24/7, so even when your computer is off, your friends can play. Growing an active community is easy when everyone has a server to hang out in!
- Simplify Your Server: Our in-house server management site, the Command Center, makes managing your server easy without restricting what you can do. Whether you're brand new to server hosting or a seasoned veteran, you will find our site easy to use and powerful at the same time.
- Reliable Backups: Included with all of our plans is our Vault system, which automatically makes backups of your server so you don't have to worry about losing your world if disaster strikes.
- No Hidden Fees: We charge you one price for your plan. There are no features locked behind a paywall, like mod support, storage space, automatic and manual backups, premium support chat, or anything else.
- Powerful Hardware: No matter what plan you choose, you get the same powerful server hardware. You don't have to pay extra to get the best we have to offer.

What You Need to Start Hosting Your Palworld Server
Before you get started, there's a few things you'll need to get started on your Palworld server:
- Palworld for PC Or Console: Palworld currently supports crossplay between the Steam PC version, the Xbox Gamepass client, and all consoles.
- Akliz Hosting Plan: Palworld requires a minimum of 4GB of RAM to run. Depending on the number of players, you may need a larger plan. Choose a suitable hosting plan based on your needs. Check out the pricing page here to purchase one, or contact support via the chat bubble on the bottom right of the site if you don't know which plan is right for you.
- Internet Requirements: Make sure you have a stable internet connection. Almost all broadband connections should be able to play easily. You can test your ping to our servers using our free sample servers here!
How to Set Up Your Palworld Server with Akliz
Step 1: Sign Up for Akliz Hosting
- Create an account here.
- Navigate to the Pricing Page and choose the plan that's right for you. You'll need a minimum of 4GB to run a Palworld server.
- Click "Buy Now" next to the plan you want.
- Take a look at everything in the Plan Overview section and make sure all of your choices look good. (Hint: you can get a discount by choosing a term for your plan longer than 1 month!)
- Click Next.
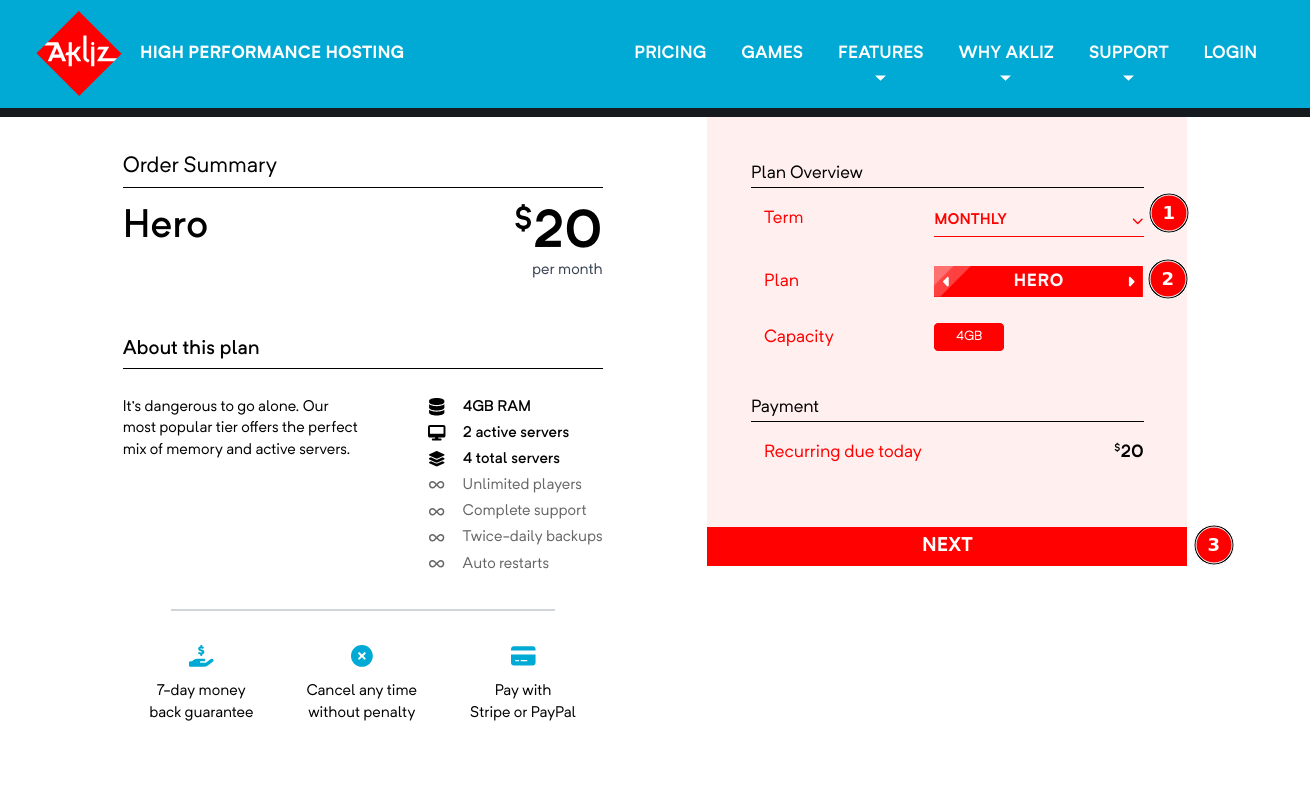
- Add a payment method. This can be a credit/debit card or PayPal.
- Click "Pay Now" to finalize your payment and start your plan!
Step 2: Access the Command Center
- Navigate to the Command Center and make sure you are still logged in.
- This will bring you to your Servers page. Here you will be able to see a list of any servers you have created.
Step 3: Create a New Palworld Server
With any Akliz plan, once you have a plan you can start creating servers. These servers, when started, use your purchased RAM. You can see how much RAM you have used and available, as well as how many servers you can create and run on the left side of the Servers page.
- Now that you're in the Servers page, you should see a button labeled "Add Server". Clicking that button will bring you to a list of games available for installation.
- Select "Palworld" from the list of available games.
- On the next page, you will be able to create a friendly address that will be used to connect to your server. You can put anything you'd like here, as long as it's not already taken.
- Confirm the configuration and click "Create Server" to initialize the server.
- Once it is created, you can start your server by clicking the blue "Play" icon, or click on "Manage" next to your server to see the console and other info, and you can click "Start" at the top right of the page. Your server needs to be started before you can join.

How to Join Your Palworld Server
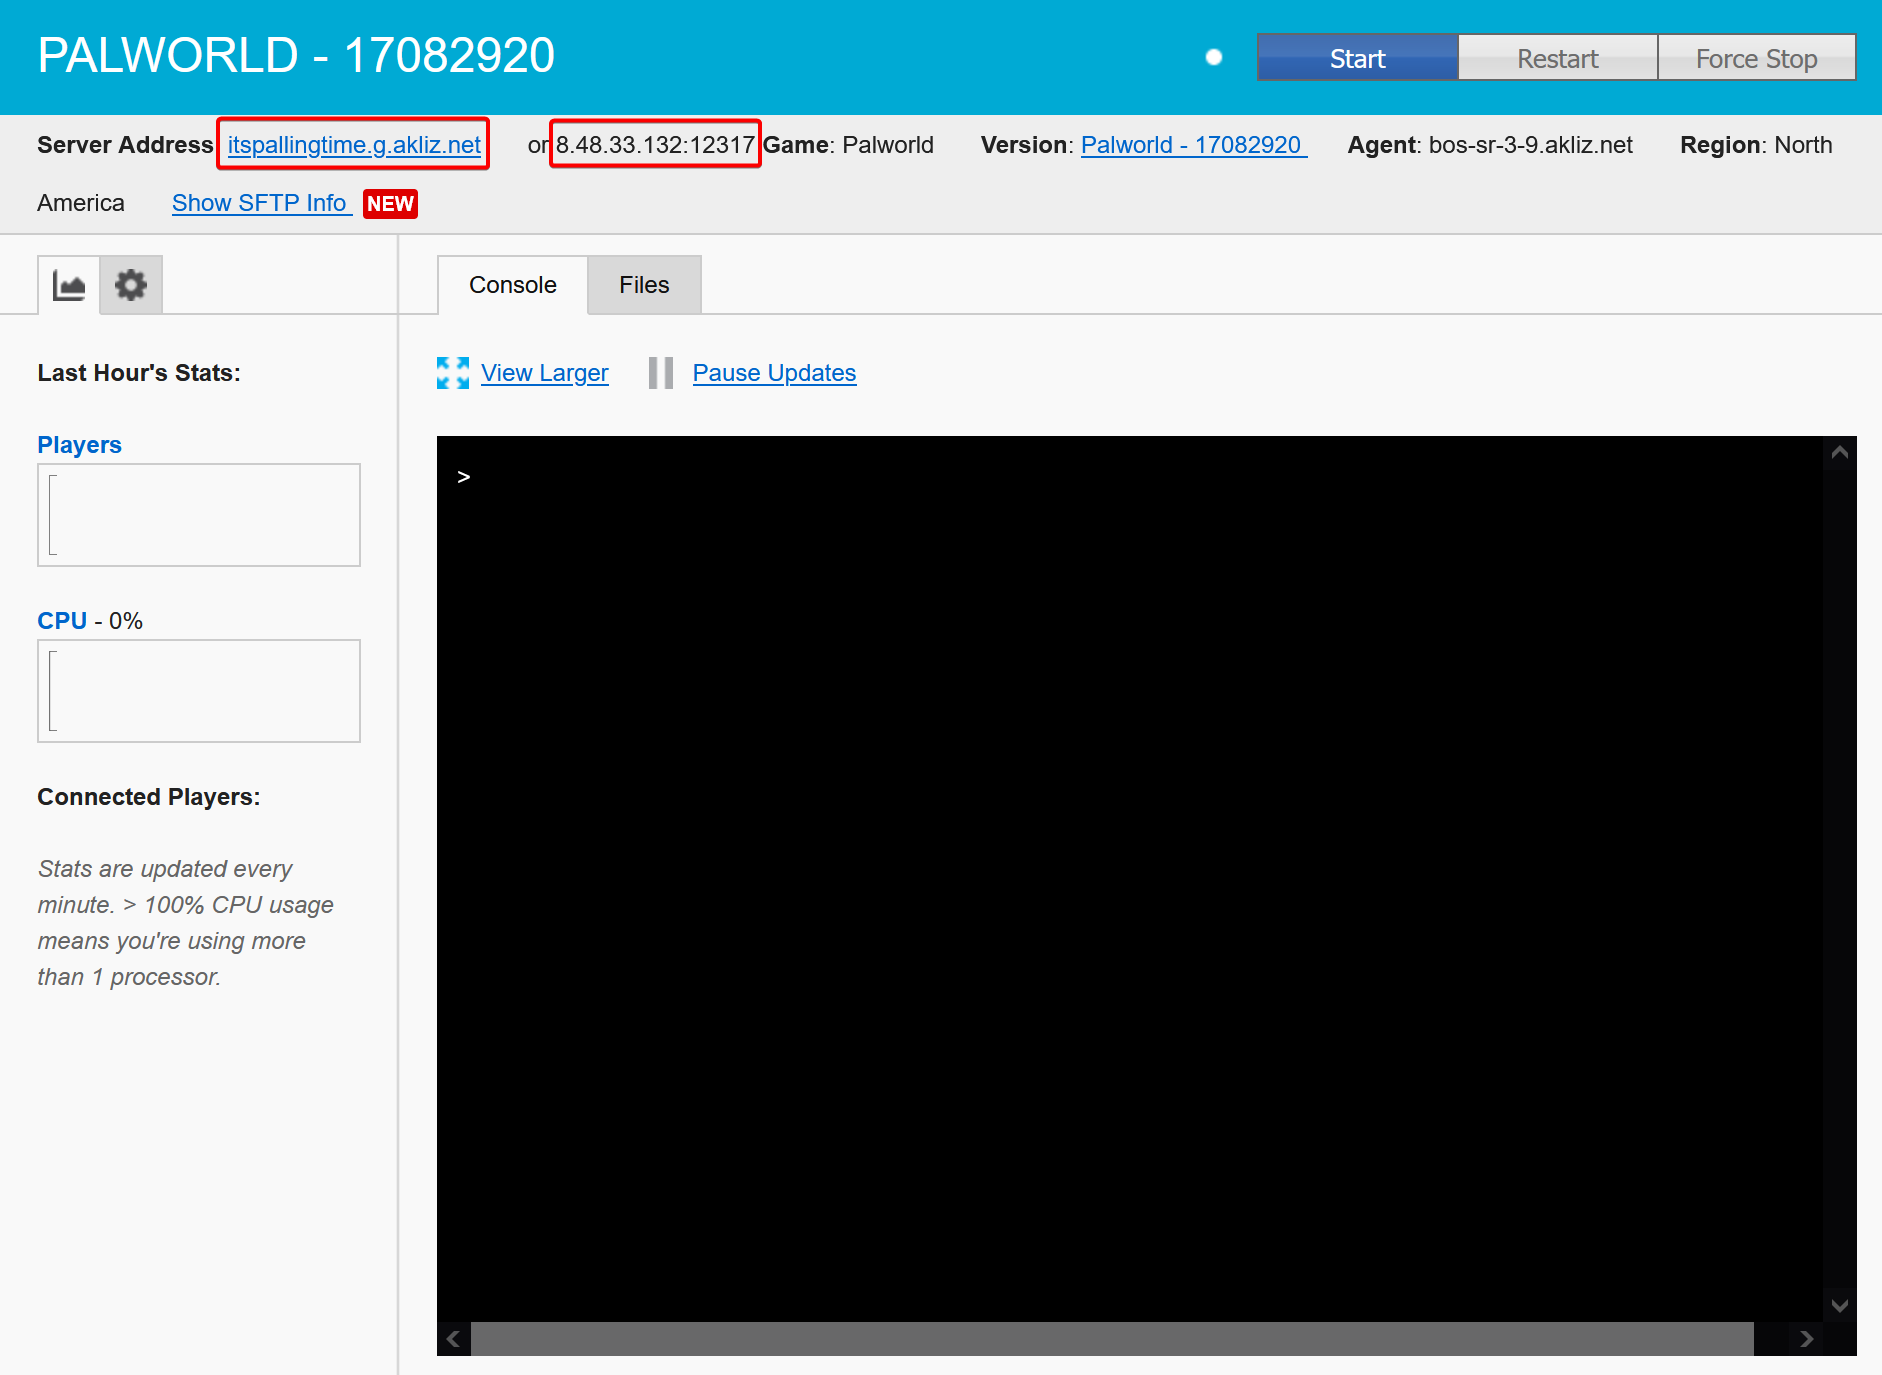
Step 1: Locate the server address in the Akliz Command Center
You can use your friendly address or your direct IP address. This can be found in your servers list, or on the console page for your server. You will also need the port for your server, which is the 4-5 digits listed after the IP number.
Step 2: Launch Palworld and go to the "Multiplayer" menu
Step 3: Enter your server address & port, and click "Connect"
If you have a password set, make sure to check the "Enter Password" box.

Customizing Your Palworld Server
Palworld has a variety of options you can set on your server, from egg hatching time to material gathering rates.
All of Palworld's settings are controlled by a single master settings file, which you can edit to customize your experience.
Step 1: Run the server to generate files
When installing the server, there will not initially be any config files. Running the server once, letting it run for 30-60 seconds, and then stopping the server will generate the needed files.
Step 2: Copy data from the "Defaults" file.
In Command Center, click "Manage" to open your server management page.
From there, click the "Files" tab to open the file browser. You'll see a file there called "DefaultPalWorldSettings.ini".
Do not edit this file.
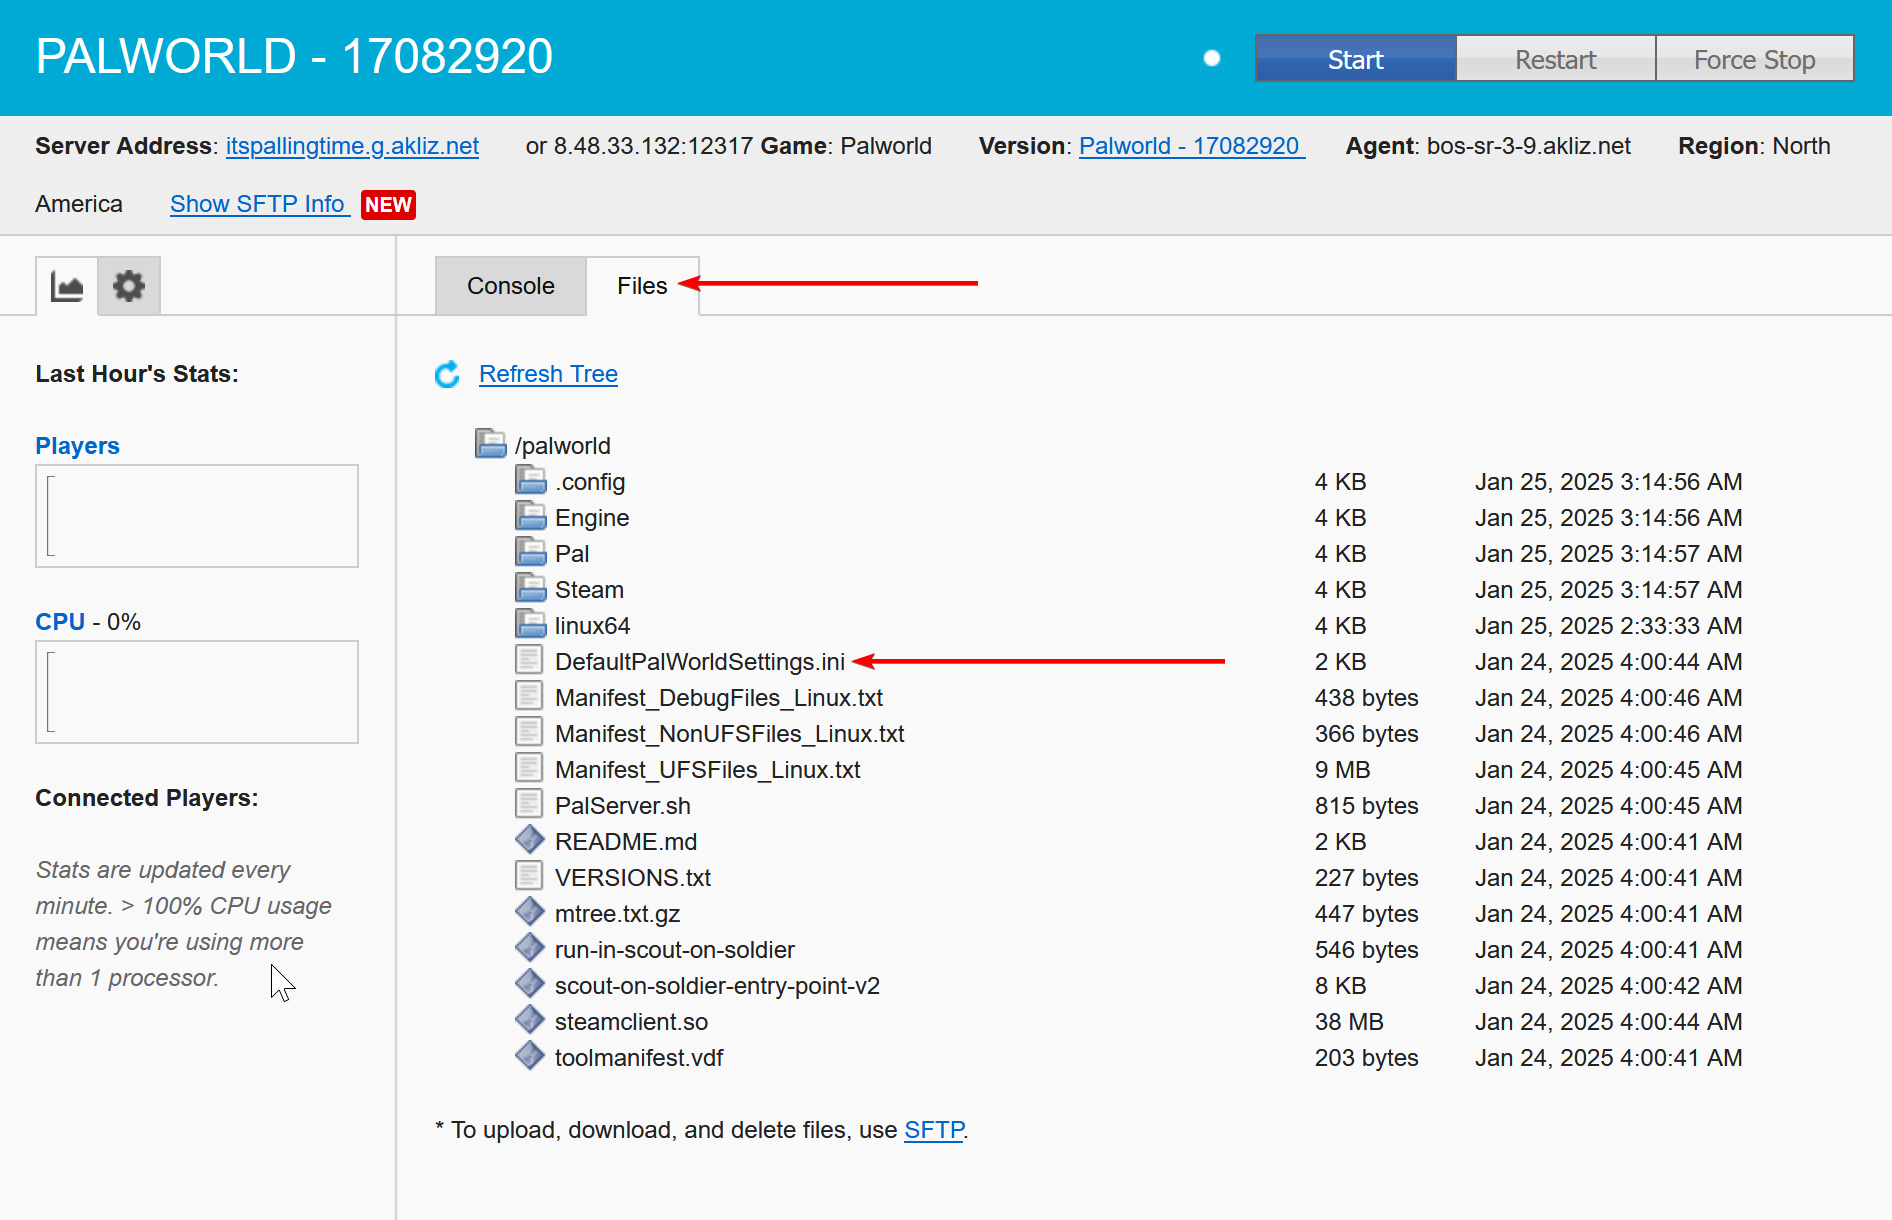
This file contains the defaults settings for all Palworld servers. You'll need this for the next step. Clicking on it will open it in the Command Center file editor.
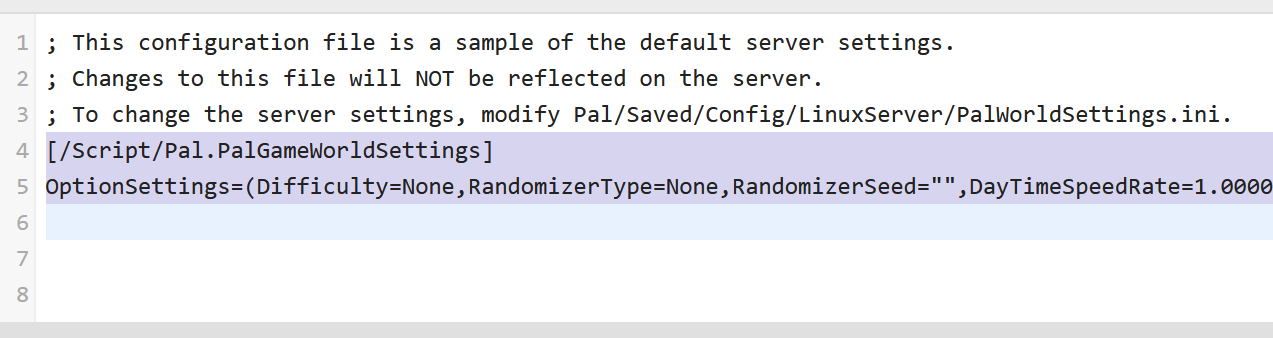
You'll want to highlight & copy the bottom two lines here.
Make sure to copy the "[/Script/Pal.PalGameWorldSettings]" line, as it is required for the settings to be loaded.
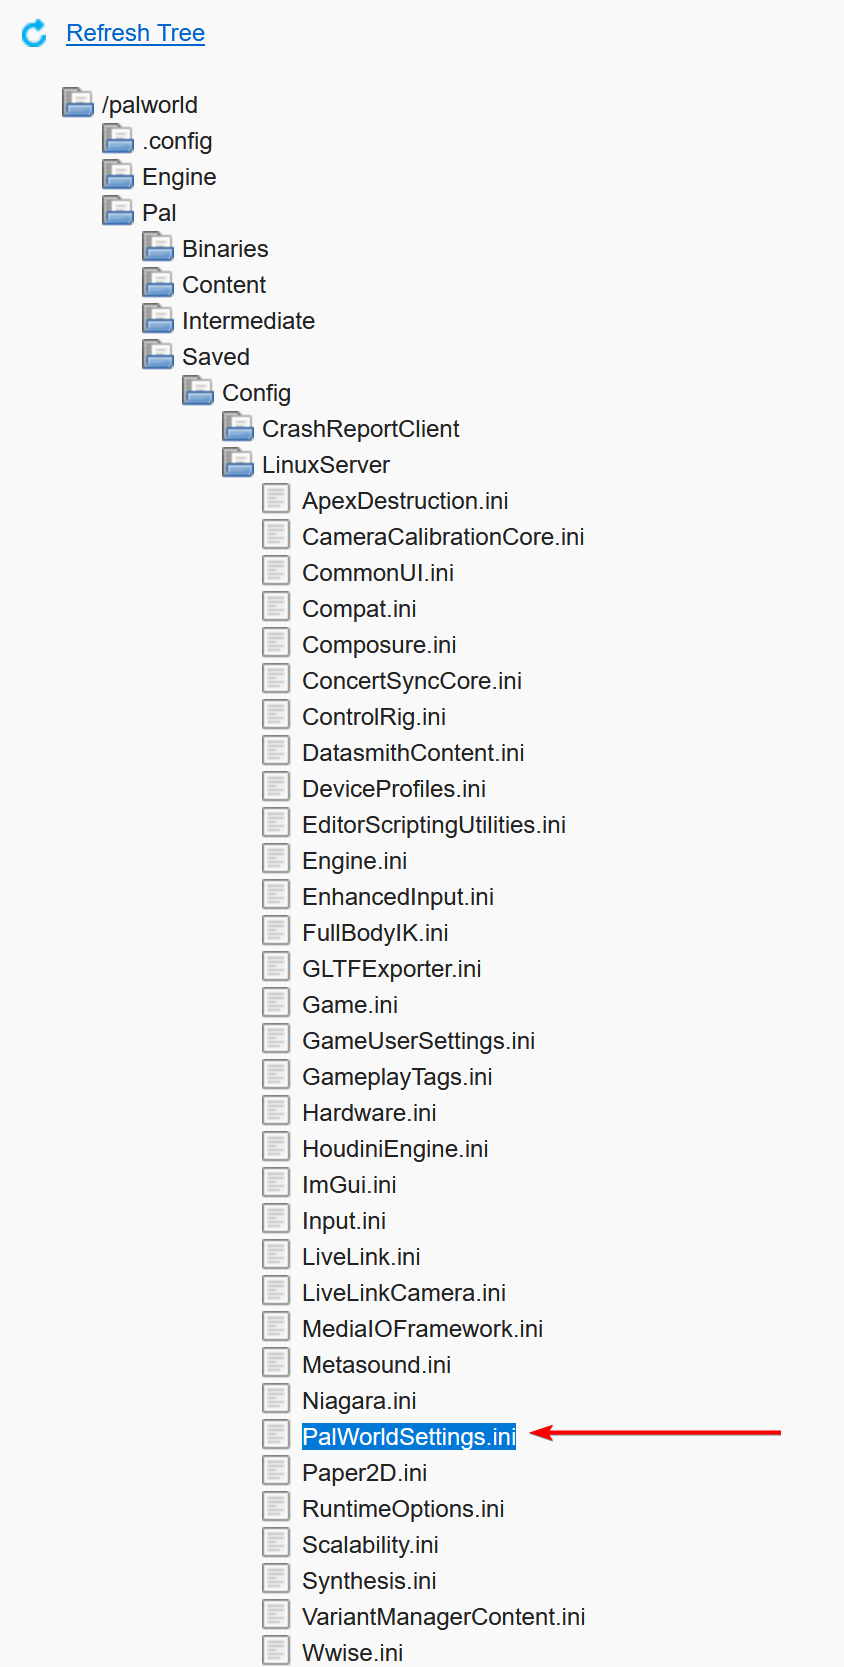
Step 3: Locate the PalWorldSettings.ini file, and paste the default data into it
Still in the Files tab, click on the "Pal" folder to expand it.
Within that folder, click on the folder "Saved", and then "Config", and "Linux Server".
This will open the folder with all config files. The file that determines server settings is "PalWorldSettings.ini". Click on this file to open it in the file editor.
This file should be blank. You can paste the 2 lines copied from the previous step into this file.

Step 4: Customize your settings
On the line that starts with "OptionSettings=" are all the settings for your Palworld server. You can change any values you'd like here, and when you're satisfied, click "Save" to lock in those settings. Settings will be applied the next time your server is started - if your server is currently running, changes will not be reflected immediately, and you will need to restart it.
If you're not sure what settings to change, we have a detailed breakdown on what options are available.
Common Issues and How to Solve Them
As with everything, sometimes Palworld servers can run into issues. To help with this, we have a number of help articles and an experienced support team to make sure you have the smoothest experience possible. Here are some of the most common issues and how to solve them.
My server keeps randomly crashing!
Some Palworld server settings can cause the server to run low on RAM, particularly with a large number of players.
Following the above instructions for changing server settings, you'll want to isable login penalties (bEnableNonLoginPenalty=False) and isable raids (bEnableInvaderEnemy=False).
If this doesn't resolve your issue, please open a support ticket.
Why aren't my custom settings loading?
- Make sure you've rebooted your server after making any changes to the Palworld Settings.
- Check that both lines are included in the PalWorldSettings.ini file: the "[/Script/Pal.PalGameWorldSettings]" line, and the "OptionSettings=" line after it.
- Any invalid settings (misspellings, numbers outside of the acceptable range) will cause the entire file to be rejected, and settings will load as defaults.
Try copying from the "Defaults" file again, and triple-check any changes made are valid.
I can't connect to my server using Xbox or PS5
In order to connect to your Palworld server from console, or using the in-game Community Servers list, you'll need to set a server name & configure the server for console connections.
We have a guide on how to set that up here: How to enable crossplay on a Palworld server
Start Hosting your Palworld Server Today
Akliz offers tons of benefits over hosting locally or other solutions. Our Command Center is powerful and simple and lets you skip the nonsense and get straight to the game. Our hardware is some of the best in the business and our support is top notch. You can't go wrong, no matter what game you play.
If you want to host a server for another game, we let you switch games under a single plan, as long as you have enough RAM. Check out all of the games we host below!

Updated 13 days ago