Install Mods on a Don't Starve Together Server
Adding mods to your server is very easy. Don't Starve Together has a system that will automatically download and install the mods from the Steam Workshop.
Set Up Cluster Token FirstIf you haven't set up your Cluster Token and uploaded the files for that, click here first.
Adding Mods to the Server
- Click on the Files tab in Command Center then navigate to
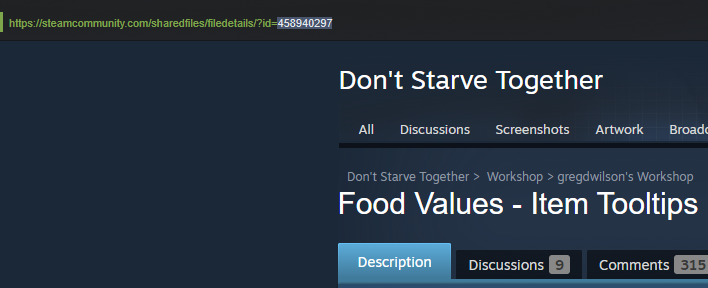
/dont-starve-together/mods/and click on the file nameddedicated_server_mods_setup.lua - When looking at the mod on Steam, check the address bar for the mod id as shown below:

Server Mods and Client modsSome mods can be only installed on a client or server. Some mods require both to be installed in order to connect. Check the mod description for more information.
- Follow the guide in that file to add the following setting for each mod at the top of the list:
ServerModSetup("xxxxxxxx")
Enabling the Mods
- Create a text file using Notepad or similar called
modoverrides.lua. Inside of that file, add the following, replacingxxxxxxxxwith the mod IDs from before. Add extra sections like the middle one as needed.
return {
  ["workshop-xxxxxxxx"]={
    configuration_options={  },
    enabled=true
  },
  ["workshop-xxxxxxxx"]={
    configuration_options={  },
    enabled=true
  },
  ["workshop-xxxxxxxx"]={
    configuration_options={  },
    enabled=true
  }
}- Upload the file using SFTP to the following location on your server:
/dont-starve-together/.klei/DoNotStarveTogether/Cluster_1/Master
Overworld and CavesIf you have Overworld and Caves split apart, the process will be similar. The only difference being, uploading the modoverrides.lua file in the _/dont-starve-together/.klei/DoNotStarveTogether/MyDediServer/Caves _folder
- Start up your server and the mods should now automatically be in the
/dont-starve-together/mods/folder under the Files tab in Command Center.
Updated 3 months ago
