Update Java
You are likely using an older version of Java for your Minecraft installation as the default version is quite old. Since that could lead to exploits, it's always good to make sure you're using the latest version of Java. To do so, follow these instructions:
Version 1.16 and belowThese instructions are only for version 1.16 of Minecraft and below. So check what version of Minecraft any modpacks you may be playing are using.
Install the Latest Java
First, you need to make sure to install the latest version of Java. Click on this link and follow the instructions to install the latest version on your computer.
Install the Latest Minecraft Launcher
Second, you'll want to make sure you're using the latest Minecraft launcher. You can download and install it here.
Configure Your Launcher to Use the Newest Version
Last, you'll need to configure your launcher to be able to run the latest version. Refer to the launcher you're using below. For any launchers not listed, the steps are likely similar.
Vanilla Launcher
Minecraft updated their launcher at the end of 2021. These are the steps to change the run arguments for that version of the launcher.
- Click on Minecraft : Java Edition
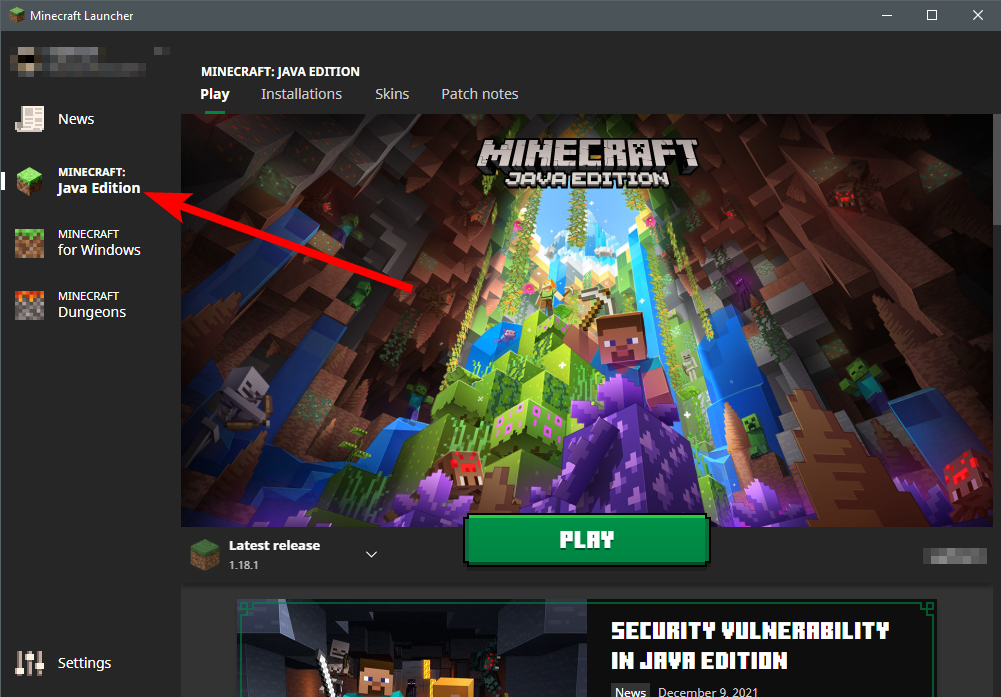
- Click on Installations

- Click on the three dots ( ...) next to the release you are using and then on Edit
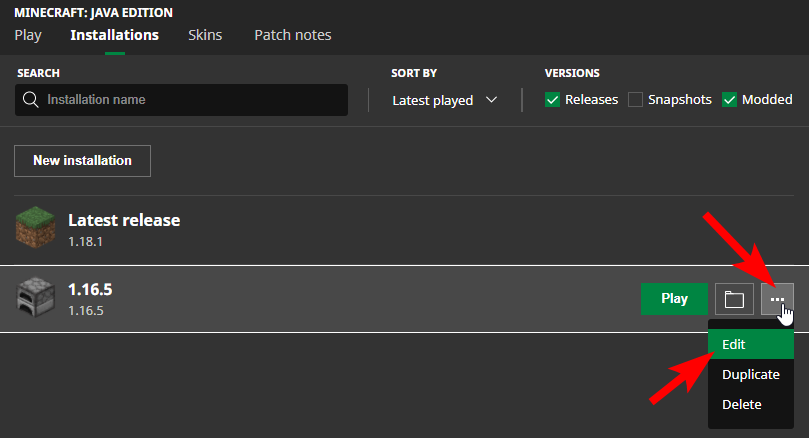
ModpacksIf you're doing this on the vanilla launcher for a modpack, the modpack name should show in the installation list. That is the one you would want to edit.
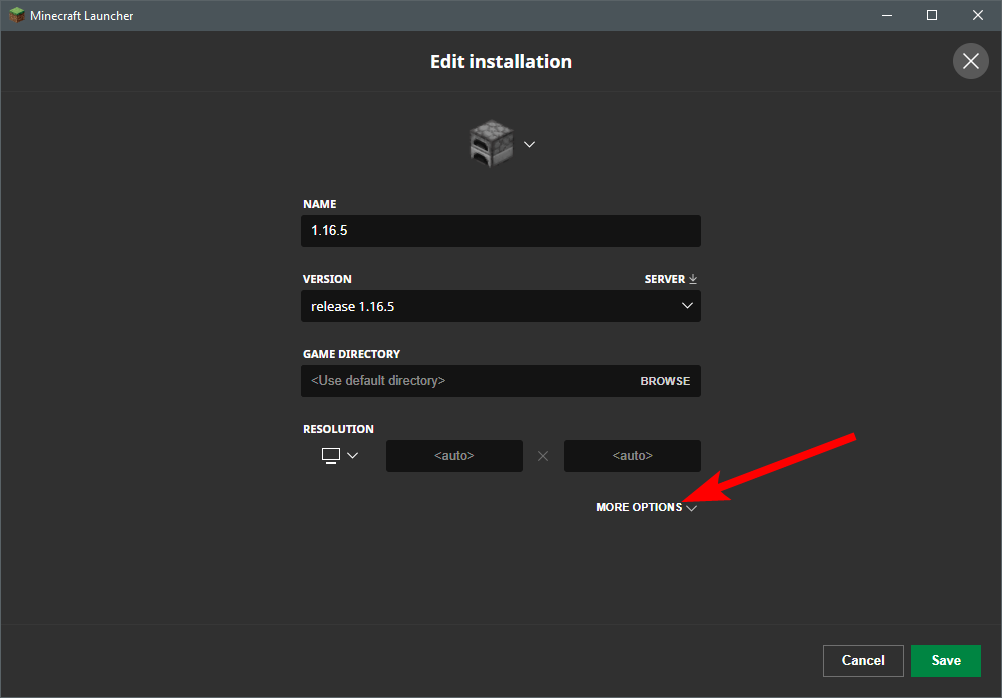
- Click on MORE OPTIONS
- add
-version:1.8+to the left in the JVM ARGUMENTS section
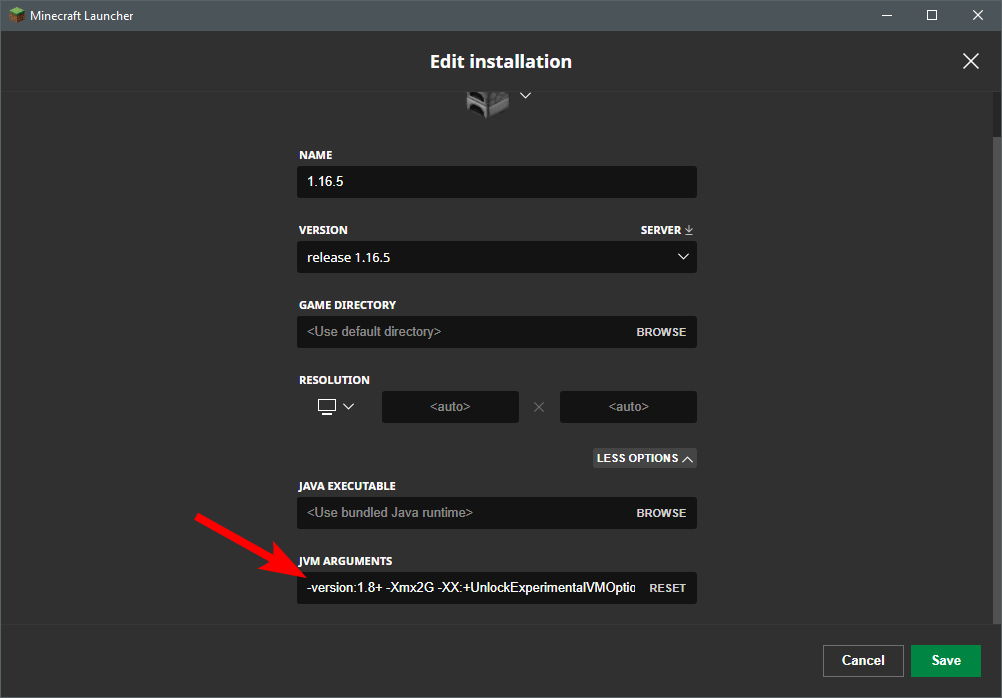
- Click on Save

That's it. You should be good to go now.
CurseForge Launcher
- Click on the options icon in CurseForge.
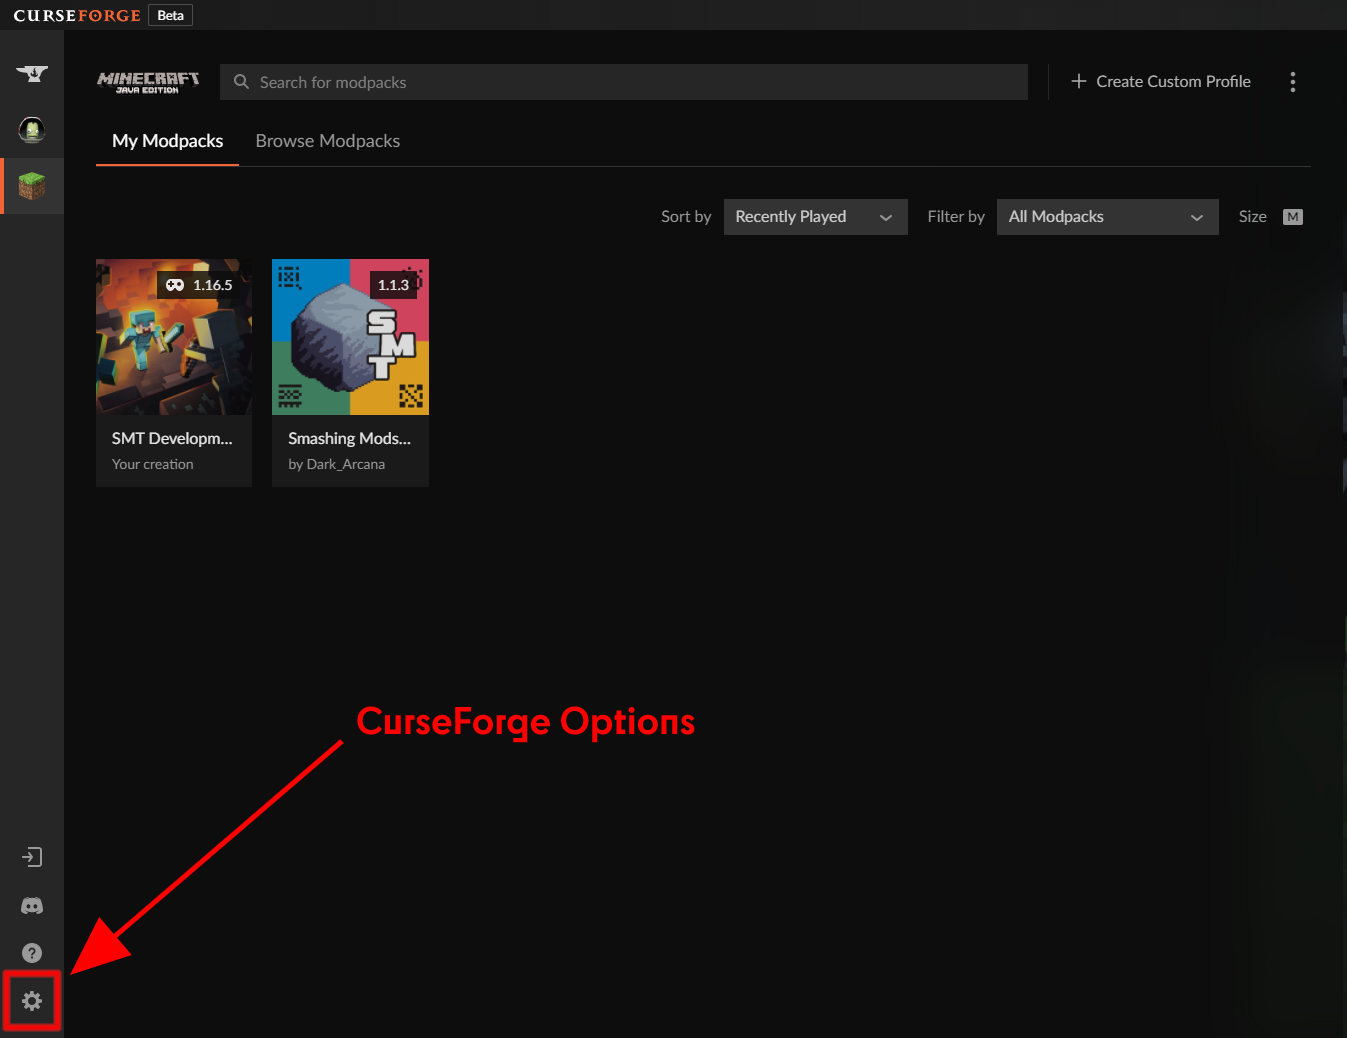
- Click on Minecraft on the left and then add
-version:1.8+to the Additional Arguments section.
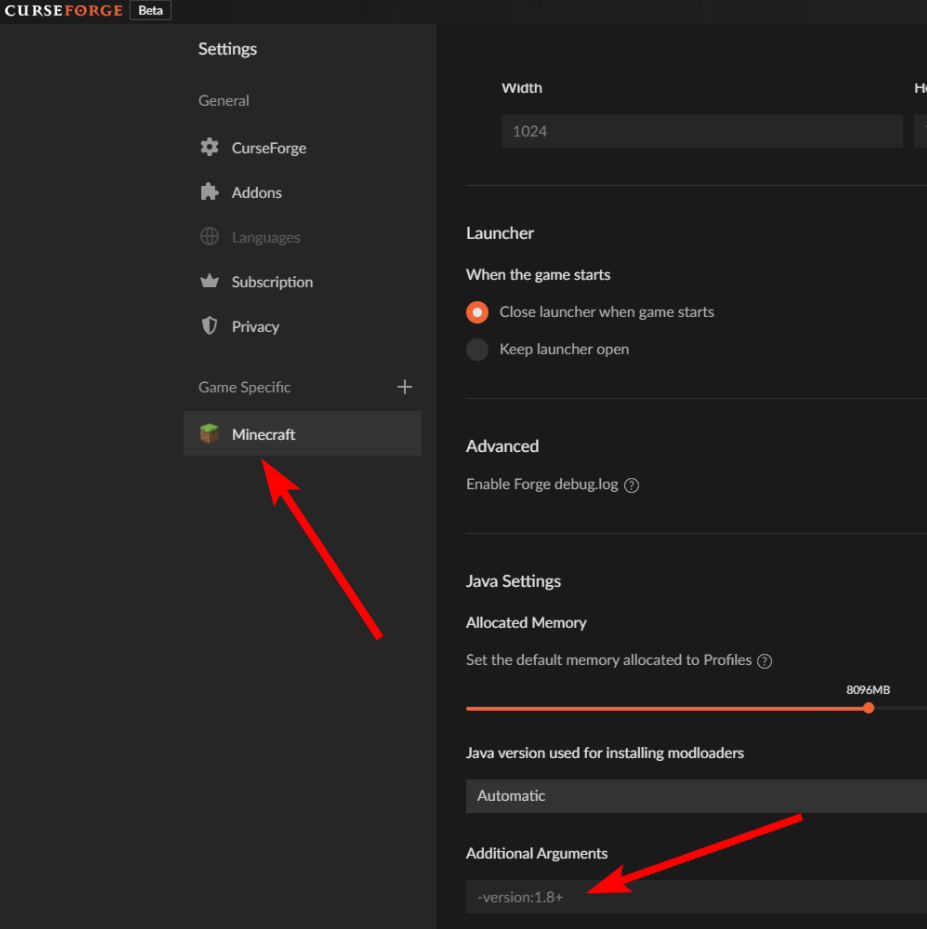
That's it. You should be good to go now.
Updated 3 months ago
